Sunday 10 November 2013

We Have Moved

Looking for more tutorials? Visit us at Projectarian for more projects and free stuff!

http://www.projectarian.com/


Monday 4 November 2013

Bubblegum Bunny ~ Free crochet beanie pattern


I recently joined THE friendliest Facebook group on earth for people who like to crochet. I posted a picture of my Tatty Teddy there and what an exciting time it was when the nice people gave me a brazilian likes and comments. I'm not used to that kind of attention :3 A few people asked for the pattern and I'd like to make it available but I've never written a crochet pattern before, except for the little round disc in my Yarn Tail Tutorial, which doesn't count.

So, I decided to start small and make a test pattern of my most simplest design, which is this Bubblegum Bunny.


If you use this pattern, please give me feedback!! I'm pretty sure everything is correct except I don't know what Double Knit yarn is in USA terminology. I use UK terminology myself so if somebody could help me out, that would be great!

**This pattern will be free for a limited time only**

Download it here or shop for beanies and other accessories here <3

Saturday 2 November 2013

Leather Armour Tutorial


I made some fake leather armour for my friend's wolf costume for Halloween. It's the first time I've made armour and it's not that fancy because I didn't have forever to work on it, but maybe that makes the tutorial easier to follow :3


What you'll need:

Vinyl fabric in black and brown
Taffeta fabric
Paper
Sewing stuff
Super chunky wool
Metal studs
Nuts and bolts (yup!)
Keyrings


Step 1
This is the spaulder.
Sketch a basic pattern on paper. Cut it out and pin it together. Try it on your guinea pig and trim or shape it where needed.
   

Step 2
Number each piece so you can keep track of what goes where.
Cut one of each piece out of black vinyl fabric, and one out of taffeta to use as lining.


Step 3
Do the same for the vambrace.
It should be tapered along the length, with a straight edge at the wrist, and a pointed end at the elbow
When cutting pieces for the second layer of the vambrace, leave a seam of about 3cm for the top layer to overlap


Step 4
Sew the taffeta to the wrong side of the leather


Step 5
Cut strips of brown vinyl fabric, about 2.5 cm wide. 
They should be cut on the bias (at a 45° angle to the selvedge) so they can stretch a bit around the curves when you sew them on


Step 6
Pin the brown strips to the curved edge of each piece of black vinyl, with the wrong sides facing together and sew.


Step 7
Fold the brown trim over and sew.


This brown vinyl was super sticky so I really had to wrestle it through my sewing machine so the stitching came out horribly messy. I tried putting a sheet of paper between the fabric and the machine but it didn't work and I was too lazy to Google other methods but I'm sure there are better ways of doing this :P


Step 8
Do the same for the straight edges, except make a small hem in the brown strip so it leaves a neat end.


Step 9
Pin everything together and try it on your guinea pig to figure out where the straps should go and how long they should be. It works out pretty adjustable in the end so you don't have to be very accurate to make it fit.
Cut straight strips for the straps. 
Using the same method, sew brown trim on these edges too.
To make the small loops, cut small straight strips and hem the edges


Step 10
Sew everything in place, except the last four flaps on the spaulder, because they need to be able to move with your arm.
Use nuts and bolts to attach those flaps. Poke holes through the fabric with a metal skewer in the place where you want the bolts to go. 
Push the bolt through from the wrong side so that when you screw the nut on it's visible from the right side.


Step 11
Now you can attach keyrings to the spaulder's straps and then decorate both pieces of armour with studs


Last step
Use super chunky yarn to tie your armour on, then go be awesome! ^_^


Thanks for visiting! See the finished costume here

Friday 25 October 2013

Making a yarn tail

As I mentioned before, I'm making a wolf costume for my friend because we're dressing up as Red Riding Hood and the Wolf, so we need a big fluffy furry tail! I was going to just sew one with fur fabric but the silly fabric shops here don't stock fur in the summer :/ Luckily, I accidentally discovered yarn tails!!  


The video shows the movement of the tail


So obviously I am no professional since this was my first one ever, but it came out exactly how I wanted it so I decided to share the tutorial :)
The method can vary slightly depending on your preferences and the effect you want, and I'd probably do it differently next time, but here's how I did this one...

What you'll need:
1.5 balls of super chunky 100% acrylic yarn
cat brush
t-shirt yarn

First, you have to make a core to attach all the fur to. I used t-shirt yarn for mine
Cut a whole bunch of 1m lengths, (about 24) divide them into 3 bunches and then braid them
Use another piece of t-shirt yarn to tie each end tightly together so it doesn't come undone


To make the fur:

Cut lengths of yarn, about 25cm
Bunch about 6 threads together (use more if your yarn is thinner)
Tie a knot in the middle of the bunch
Make LOTS of bunches


Separate 2 strings from the bunch
Using a cat brush, start brushing the yarn
Brush the tips first and work your way up. It goes quicker this way because you get less knots (which also means less breakage)
The last picture shows a finished tuft, and all the wasted yarn that comes from brushing
{There will be tons of waste ~ I kept it for stuffing because I make amigurumi plushies too}


Tie the 2 separate strings around the core to attach the tuft
Make a few knots so they don't come loose and then cut the ends
Tie the fur tufts quite close together
Brush each layer gently before adding the next one

I wanted my tail to have a lighter tip, so I started with a beige colour wool on the tip


To cover the core completely and make the tip look a bit poofier, I sewed some fur right on the tip of the tail


By the time I got to this point, I wanted the tail to start tapering a bit, so I just cut the lengths of yarn a few centimeters shorter when making the bunches


When the tail is long enough, tie some yarn tightly around the braid to keep it together where you want the tail to end, and then cut it
This leaves a messy a pretty messy looking end though...


... so I crocheted a little disc to cover it, which will also work nicely for threading something through it for wearing

The crochet pattern is super simple, using super chunky wool:
Make a magic ring with 2 ch
Round 1: 6 sc into magic ring, ss to close it
Round 2: 1 ch, 2 sc in every sc, ss to close it, tie off


Use a thinner wool to sew the disc over the end of the tail
And you're done!


Most people flat-iron each piece of fur after brushing it and before attaching it. I wanted the tail to be really poofy and huge and wild, so I didn't flat iron mine but I'll definitely try it on the next tail!
You can also mix colours and make stripes and other extremely cool stuff that I can't wait to try.

Thanks for reading! Visit my Facebook Page for more Crayons stuff :)

Monday 23 July 2012

Papercut Art: Iron Man (Tutorial)

Hellow cool people who read my blog :D
A friend told me about paper-cutting art and it sounded fun so I decided to try make some pictures of everybody's favorite superdude, Iron Man :D 
I took step-by-step photos of the first one so you can see how to do it :)
*Some of the photos are horrible quality. Sorry, my camera was new*


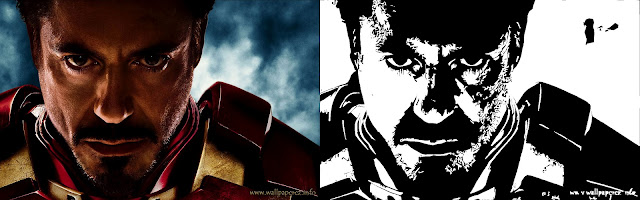
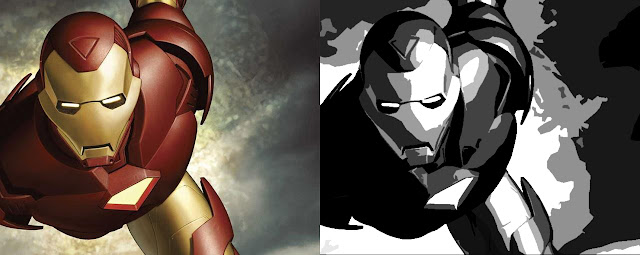
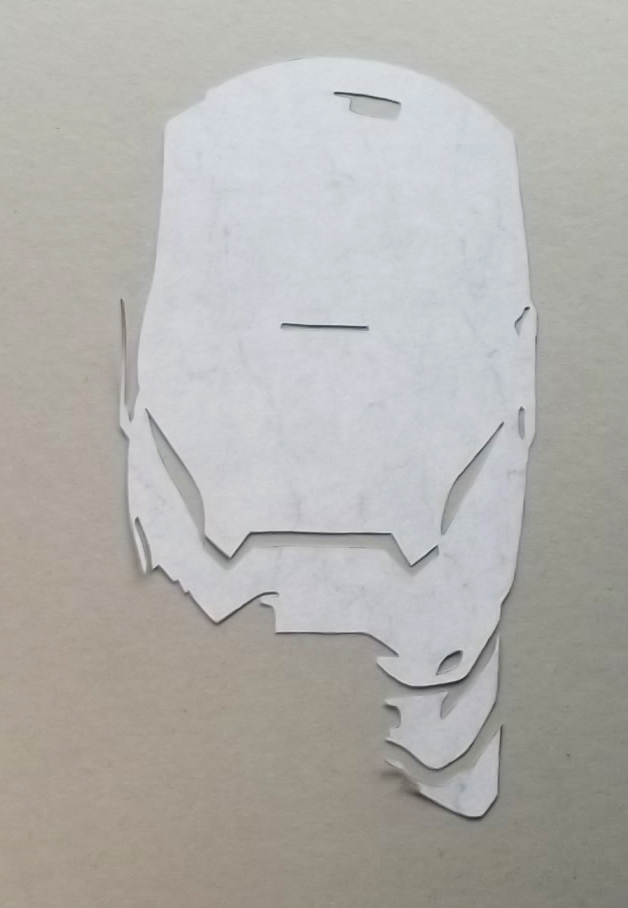
I started by downloading a whole bunch of Iron Guy images. Then I Photoshopped them until I was left with pictures made of very basic shapes, with very few colours or shades of black and white. I chose the picture above for my first ever attempt at papercut art because there's not much detail in it.

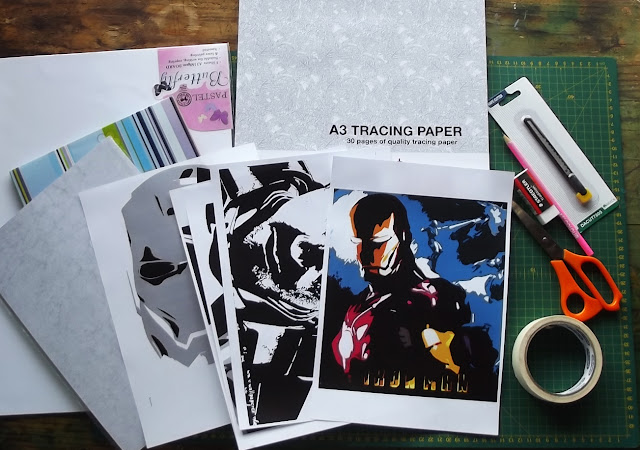
I printed the pictures on A4 paper and then got supplies together:

rubber cutting board
art knife with a snap-off blade
pencil and eraser
masking tape
tracing paper. 
cardboard and paper


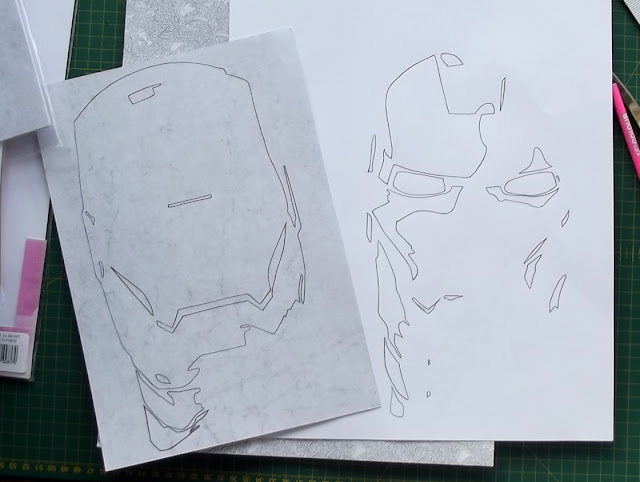
I traced the Iron Man mask
 
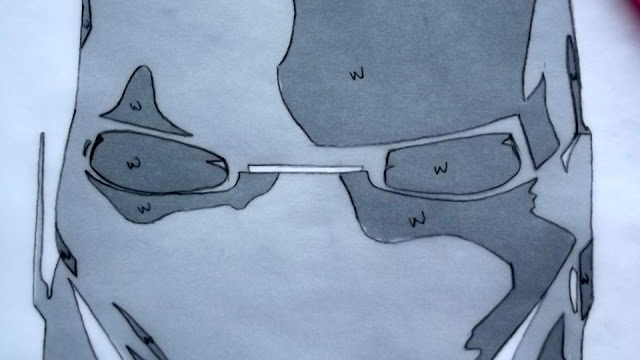
And labelled it according to which pieces should be cut from white paper

Then I traced the correct shapes onto each colour of paper, cut it out and glued the shapes and layers in place. 
Pretty simple.


I wanted more contrast between the white and grey so I re-did the whole thing from scratch, using darker grey paper, as you can see below


From here on I only took a few pictures of what I was doing since you're probably sick of reading by now :)
 
I chose this colourful picture for my second try because it looked easier than the next two  :)
I decided not to include all the background detail in this picture, so I just made up my own random lines for the picture's background when I traced it. 
I traced and cut one colour at a time, and laid the pieces out in more or less the correct position on a sheet of white paper so I wouldn't lose track of where they should go. All the tiny curves in this picture were traced and cut as straight lines because giant art knife blade is giant.

I used white, blue, 3 shades of yellow and two shades of red. 
Everything is glued on a black sheet of paper.

This one's my favorite! 
Also, it's more like the typical papercut art that you'd see around the internet because the design is cut from a single sheet of paper on a contrasting background. I used a super detailed picture for this because i wanted it to look interesting even though it has no colour.
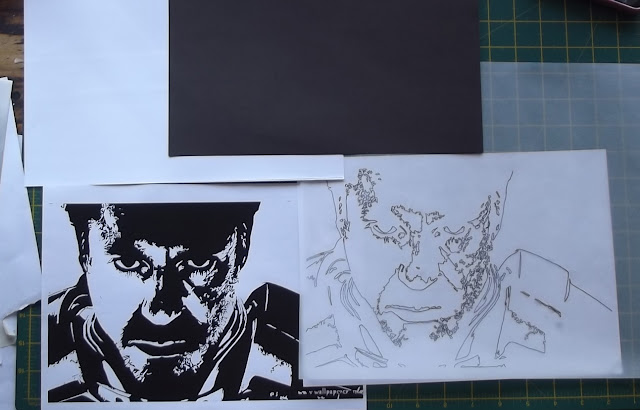
So I traced the picture, making sure that all the black areas were joined so that the whole picture would be cut from one continuous sheet of paper

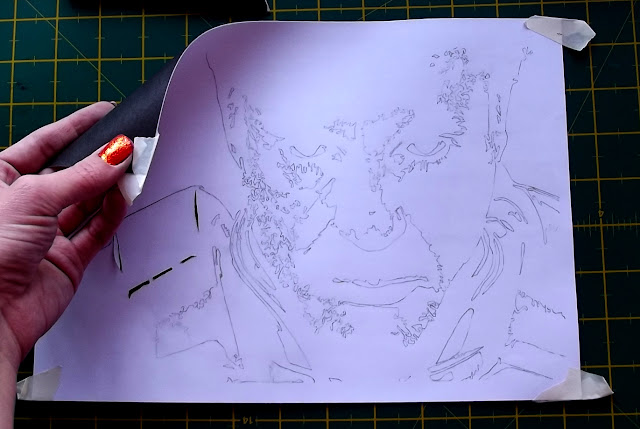
I traced it onto white paper so that I could see the lines and then taped it to a sheet of black paper and cut through both layers at the same time. Here you can see I started to cut small pieces from his shoulder.

 This picture took much longer than all of the others because of all the tiny cuts and fine detail


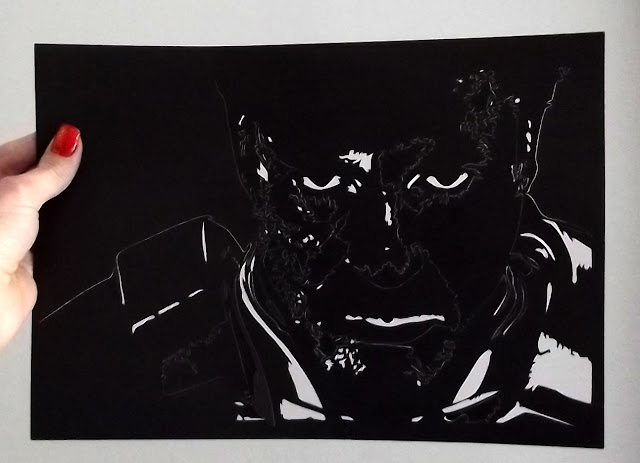
Here's what it looked like when I finished cutting along all the lines and separated it from the white sheet. Some of the cuts didn't go through both sheets of the paper and so I had to cut the pieces loose.


By the time I got to this one I was confident enough to try and cut tiny curves and also go for a proper layered effect. I edited the picture until it could be done with black, white, and 3 shades of grey.
I traced out and cut one layer at a time

In order to cut the dark grey paper I traced the shapes onto white paper again and taped the two pages together so I could see the lines.
The final picture is on a sheet of black paper, with the first layer in dark grey, then medium grey on top of that, then light grey, and white on the top layer.


Thank you for visiting!! :D

Update: I got a bit better at it and figured out how to do it without tracing anything. Also, it turns out a scalpel works WAY better than a huge art knife blade. So I even copied a photo of actual people's faces and some other stuff. You can see it here here